

When to Add Clients
A Prospect project is a great tool to use to get your client added early during the sales process so they can quickly see the value in your online project management tool. By making sure that your clients understand the need for a solution, and then showing them that you have the answers, you’ll leave them wondering just how rough it would have been to build with someone else. While there is no “set” time that you are required to add your client, consider the following options.
1) From Day 1
Add your client from day 1 when you start to build an Estimate for them. This will open up communication with your client on CoConstruct and allow your client to see the full process while you’re building what will be included and what options they will get to choose from. This is great for those really involved clients that ask you tons of questions before you’ve had the opportunity to get your initial Estimate together.
2) After Finishing the Estimate
Add your client once you’ve completed your initial Estimate. This allows you to be comfortable with what you’re sharing before adding your client into the communication within CoConstruct. You can still use this as a sales tool since you could use this to introduce your business process and how you’re better than your competitors because your clients will always have access to their information and can reach you at all hours and know that you will see their communication and respond as soon as you can.
3) Post Signed Contract
Add your client once you’ve sold the job. Once you’ve got a signed contract and everything is ready in CoConstruct, your client is ready to go and start making their decisions and communicating while construction is underway.
4) To Manage Older Warranty Projects
You can even add your clients to past projects where you’re managing their Warranty phase. Warranty projects are unlimited as are Prospects so even if you don’t have the details of the job, you can still create a place to work with your past clients and keep up with any requests they may have.
How to Add Clients
Getting Started + The Basics
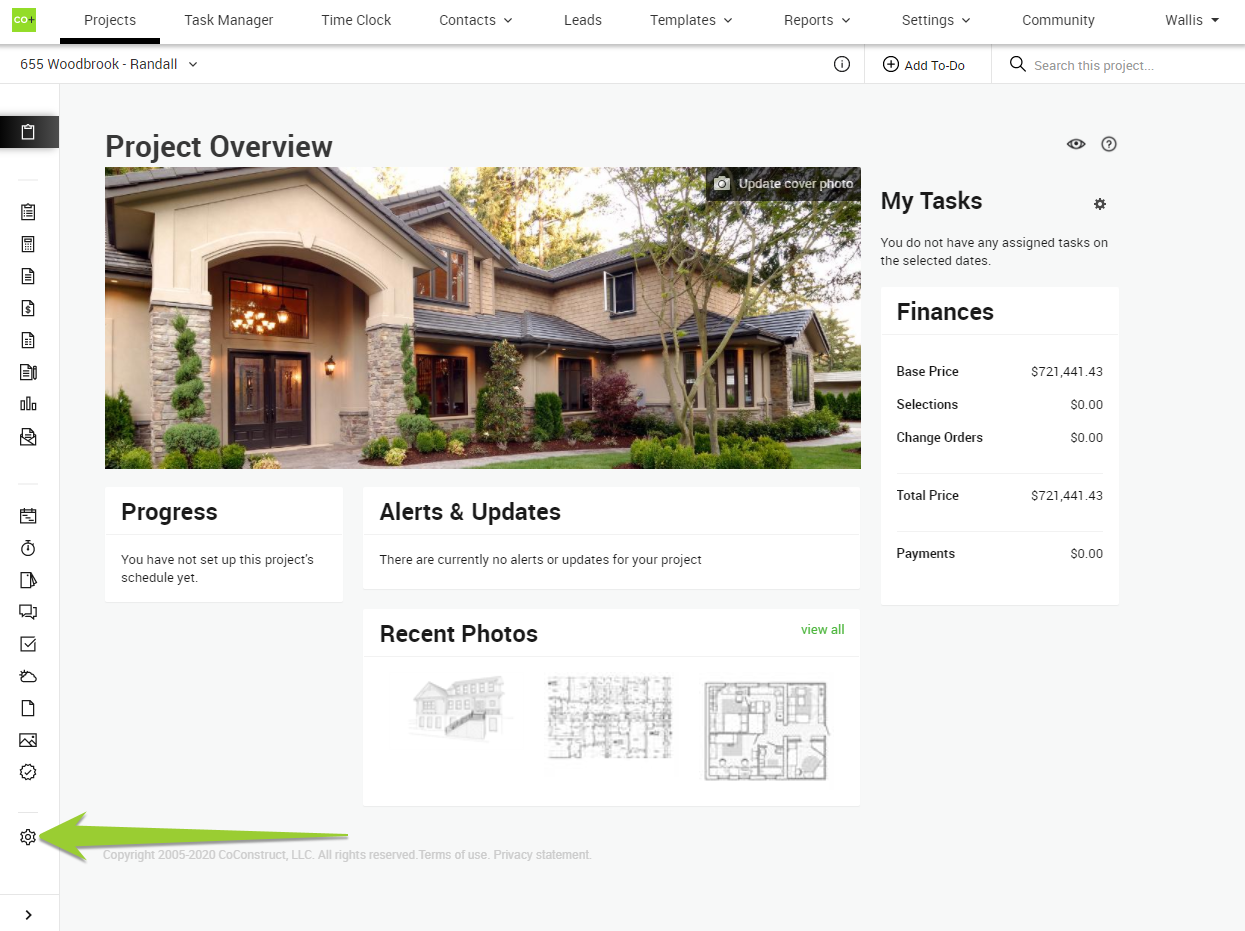
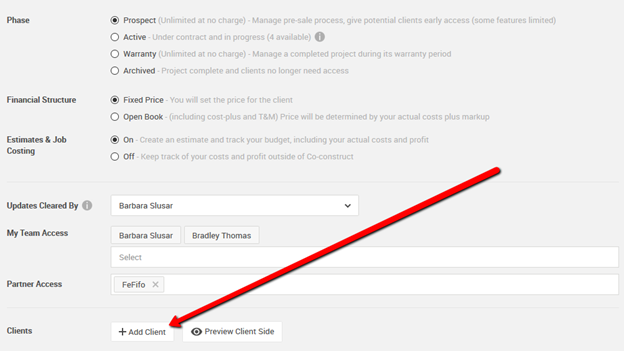
Navigate to the Project Setup page of the project you want to add your client to.
Under Clients, click + Add Client.
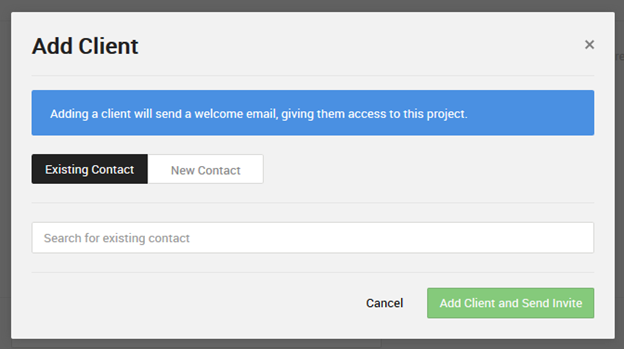
Choose between pulling in an Existing Contact by typing their name (must type at least 3 letters) or adding in a brand New Contact. Enter in a name and email address.
Determining Level of Access
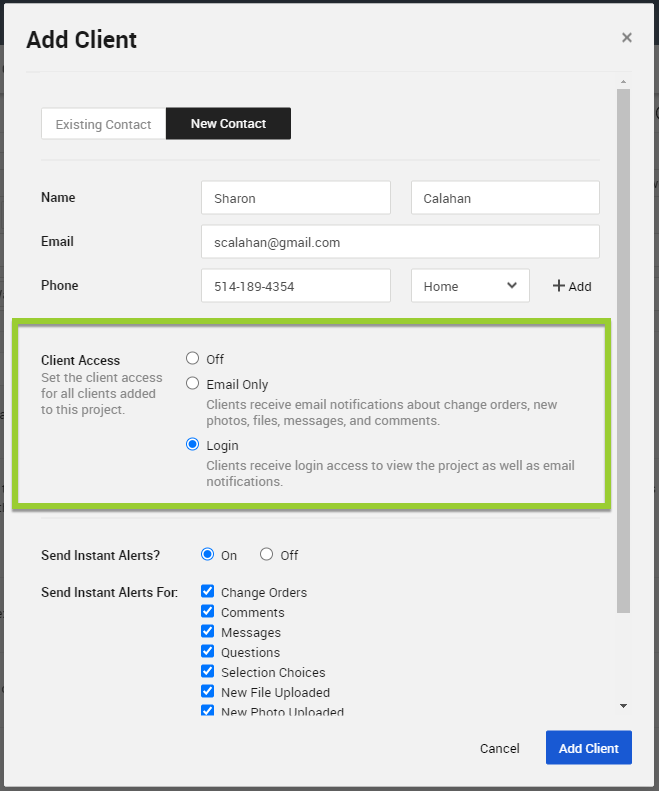
Under Client Access, choose between one of three options:
- Off = To attach client contact information to the project.
- Email Only = Clients receive email notifications and alerts for actions and updates on the projects.
- Login = Clients receive access to the online portal to see project details in addition to receiving email notifications and alerts.
For clients with Login access, additionally determine what areas or details of the project they have access to. Decide to share a more detailed schedule with the Calendar and/or Gantt views.
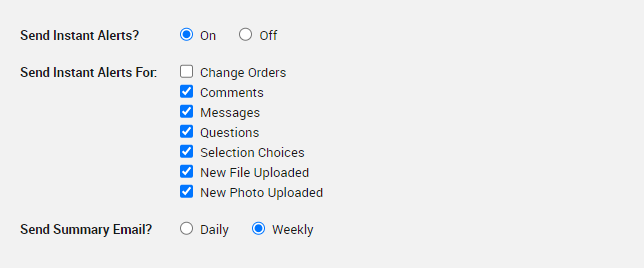
Setting Up Alerts + Notifications
For clients with Email Only or Login access, determine alert and notification preferences. Specify what Instant Alerts clients receive and at what frequency to send a Summary Email to login clients. These keep clients informed of updates and action items.
Finalize the Details
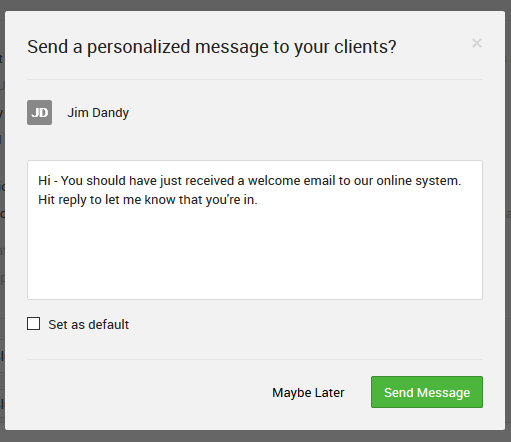
Once you add your client, you can immediately send them a message to introduce them to the online tool. We have some suggested text, but add your own and save it for your next client.
Note: Client login access is only available on CoConstruct's Plus + Ramp plans.