
There are a couple of scenarios under which you may be looking to set up a change order or variation.
SCENARIO 1: You need to account for client chosen upgrades and/or overages on allowances.
SCENARIO 2: You need to account for additional scope and price to the project for client sign off.
TO BEGIN
Follow the steps below to get started:
- Start on the project where you need to make a change order.
- Under Financials, choose Change Orders
- On the Financial Summary, select the + New Change Order button to start the change order.
- Give the change order a title and fill out any other introductory information needed for the document.
- The Line Items section allows you to account for the various costs included on this change order.
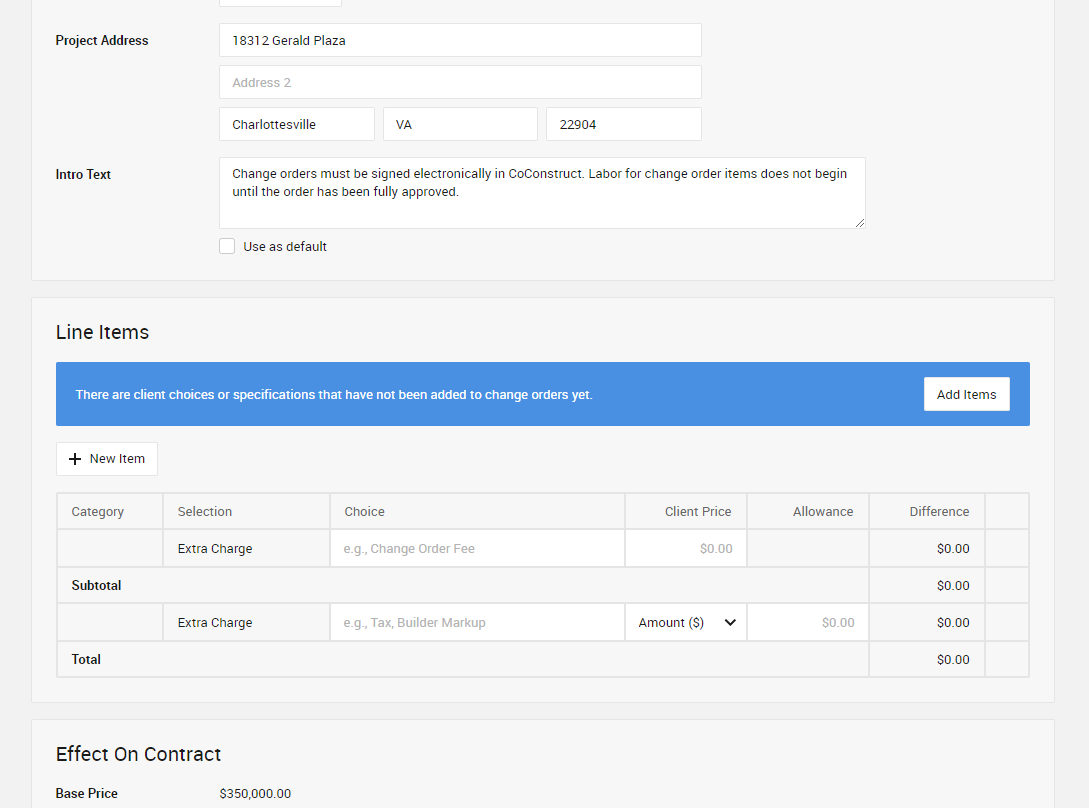
SCENARIO 1: The Blue Banner
To add any client chosen upgrades and/or account for allowance overages, find the big blue banner in the Line Items section. This banner will display on the change orders if client decisions have been logged on the Specs & Selections page. Click Add Items to select which selections and overages you’d like to include on the change order.

You’ll see a table of the client choices that can be added to the change order. This list includes items where a choice has been made and a client price or revised budget has been indicated. Check the box next to the items you’d like to add to the change order.
SCENARIO 2: New Item
To add additional scope and price, use the + New Item button. Fill out the form with the details of the change including:
- Item Name: the name of the addition to the scope of work
-
Category: where this change should be organized among other items in the scope of work
PRO TIP: Many builders create a unique category for additions and change orders that sits either at the top or bottom of the Specs & Selections for easy reference. Click the “Edit categories” link to add the new category. Type out the name in the field with a preceding number to order the category where you’d like it (ex. 0100 Change Orders for the top of the list or 9000 Change Orders to sit at the bottom), click “Add,” then “Save.” - Specification Info, Client Info, & Trade Partner Info: use these text fields to describe any relevant details
- Description: explanation of the specific change being noted -- this text will display on the change order
- “+ Add cost line”: add in any costs that contribute towards this change
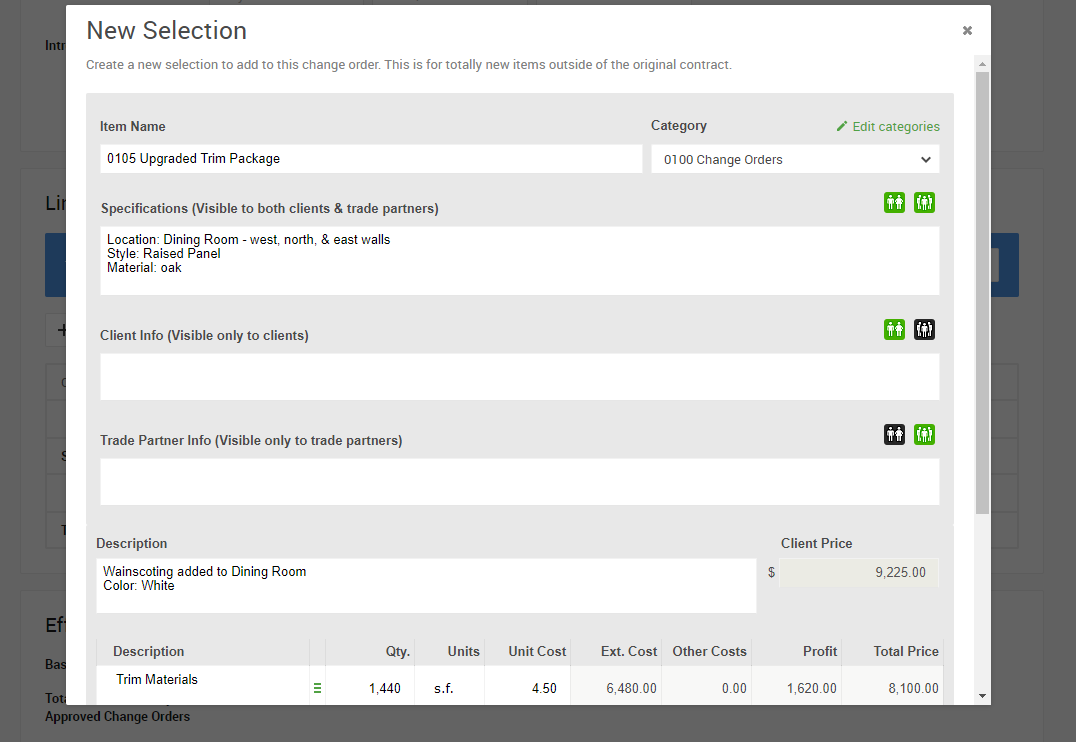
Once you’ve captured the details on the item detail page, select Add Item to add the information to the Change Order.
FINISHING THE DETAILS
Complete the rest of the details needed for the change order. Use any relevant fields to capture other terms, the effect on completion date, and closing text. Select who will approve the change order and any additional notifications. You will need at least one team member to approve the change order.
SENDING FOR APPROVAL
Finally, you’re ready to send the change order out for approval. Once you’ve got everything set the way you want it to appear to the clients, use the “Save and Request Approval” button at the bottom of the page and you’re all set!