
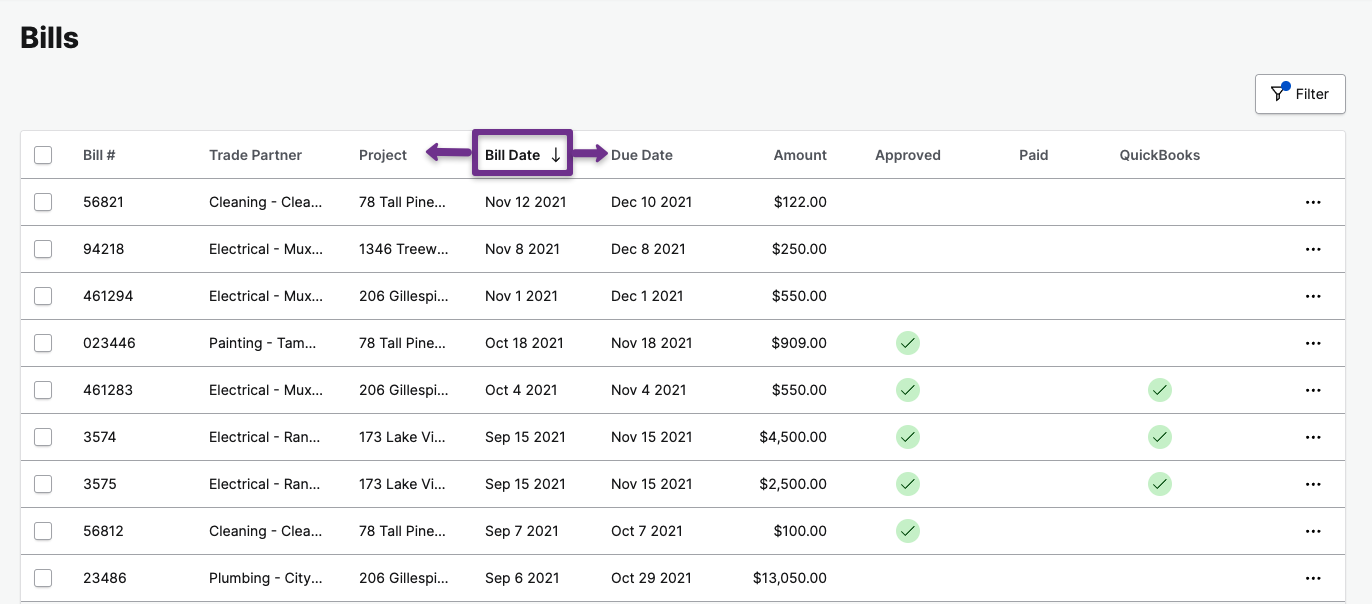
The Bills page allows you to view, filter, and interact with your bills in a centralized location. View bills entered across your entire account, or in each individual project.
Accessing the Bills page
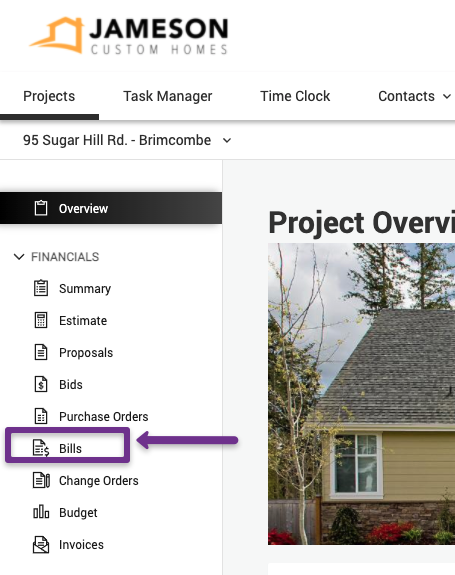
The account level Bills page is accessed through CoConstruct's navigation bar. The Bills page displays any bills attached to purchase orders on each of your projects.

Each individual project also contains its own bills page, accessible through the Project menu. This page displays all bills attached to purchase orders on that specific project.
Anatomy of the Bills page
The Bills page is organized into multiple columns. You can adjust the order of columns on the Bills page by clicking on any of the column headings and dragging the column to the left or right.
Filtering Bills
Customize your view of bills based on what information you'd like to focus on. Filter by any of the columns on the Bills page by clicking the Filter button.
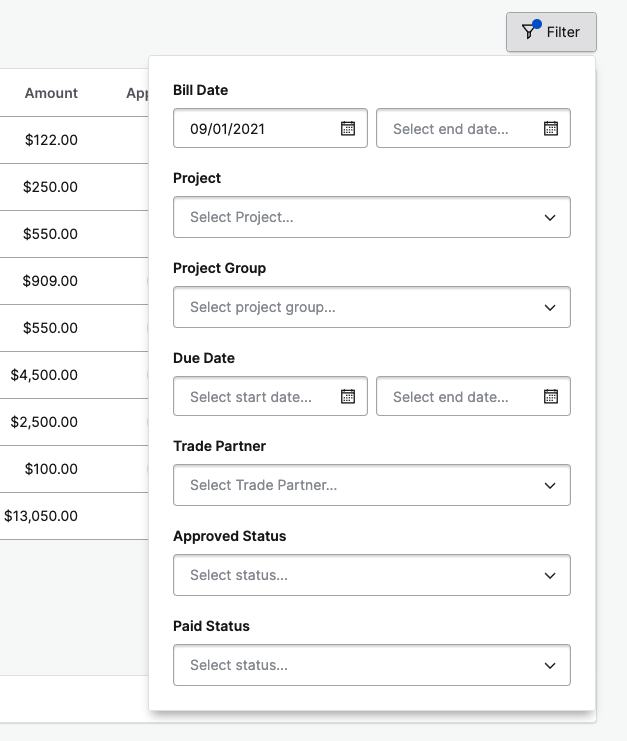
Pro Tip #1: If your projects are organized into Project Groups, your project managers can make use of the Project Group filter option to view Bills on projects specifically assigned to them.
Pro Tip #2: Filters will remain in place until manually removed
Viewing Bills
Clicking on a bill from the Bills page will take you to the corresponding project's Purchase Orders page, and display the selected bill in full detail.
Approving Bills
Approving individual bills
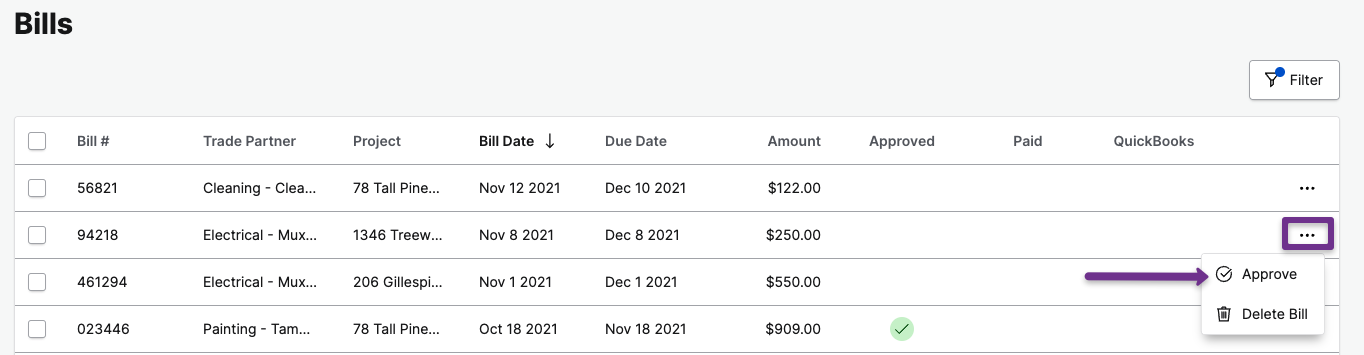
Via the individual bill
- Click the ellipsis to the right of the bill you want to approve
- Select Approve in the drop down menu
Via the banner
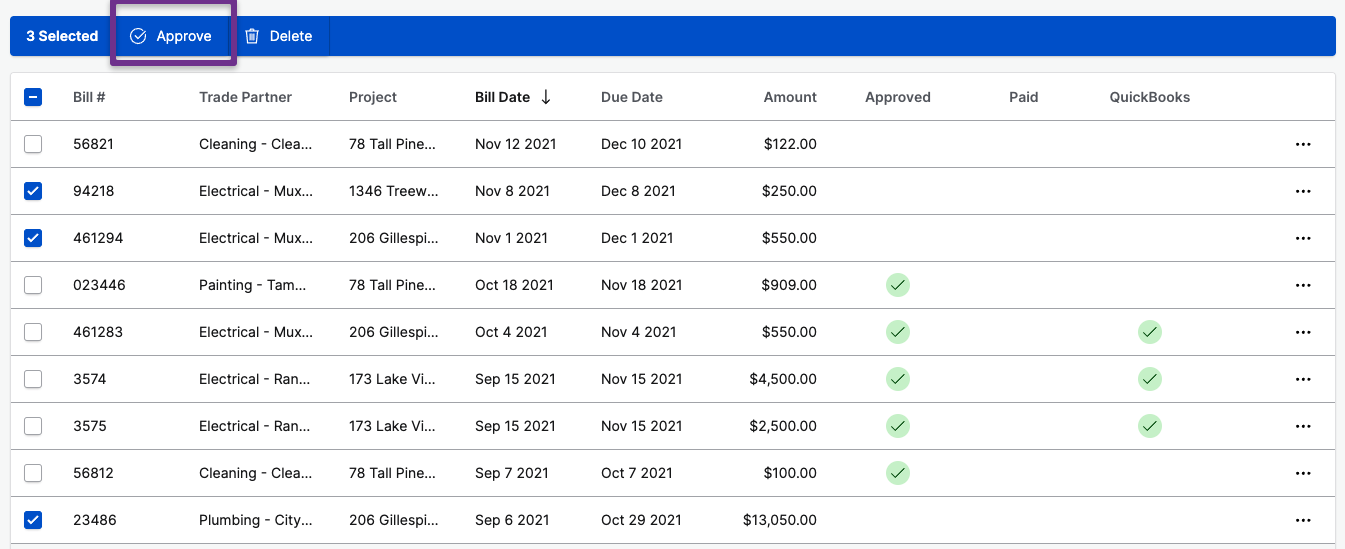
- Check the box next to the bill you want to approve
- Click Approve in the blue banner at the top of the page
Approving multiple bills
- Check any boxes next to each bill you want to approve, or select all Bills by checking the box next to Bill # in the table header
- Click Approve in the blue banner at the top of the page
Deleting Bills
Deleting individual bills
Via the menu
- Click the ellipsis next to the bill you want to delete
- Select Delete from the drop down menu

Via the banner
- Check the boxes next to the bill you want to delete
- Select Delete in the blue banner at the top of the page
Deleting multiple bills
- Check the boxes next to each bill you want to delete
- Click Delete in the blue banner at the top of the page
Paying Bills
Manual Payment
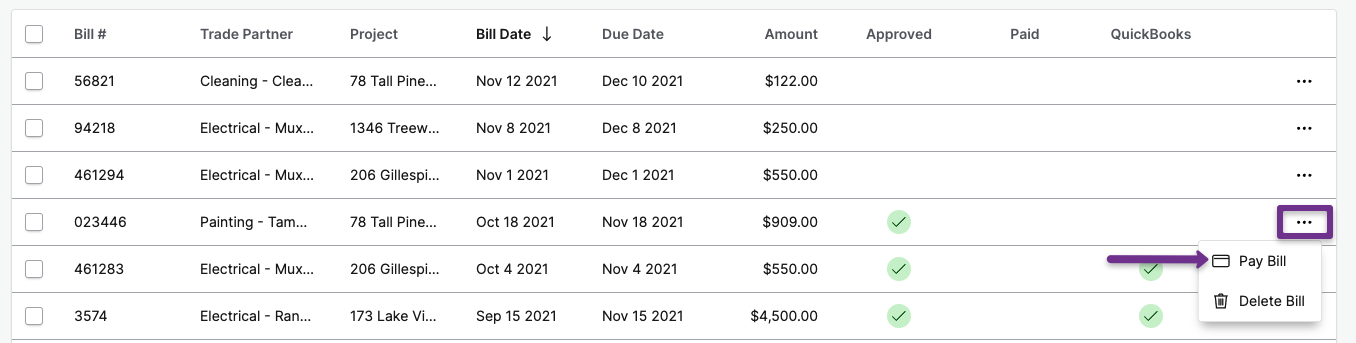
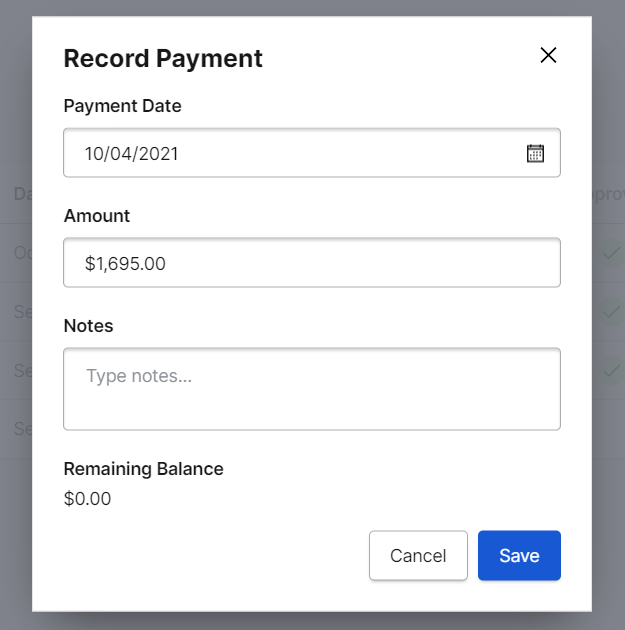
Apply a payment to unpaid, approved bills from the Bills Page.
- Click the ellipsis next to the bill you want to pay.
- Select Pay Bill from the drop down menu
Fill in the payment amount details in the pop up and click Save.
Pushing Bills to QuickBooks
If your default Accounting Integration settings are not set to automatically push your bills to QuickBooks, you can manually push your individual bills via the Bills page.
- Click the ellipsis next to bill you want to push
- Select Push Bill to QuickBooks from the drop down menu
Note: users require the Edit Financials permission to Push bills to QuickBooks