
Start on the Projects page and select the + New project button to create a project.
- General info: Give the project a name that your team will use throughout the system when working in this job. This name will be visible to clients that you add later. In the general information at the top, you can also put the project in a group to help organize things on your main dashboard, and add the address if possible.
- Phase: Choose whether you the project is in the Prospect, Active, or Warranty phase. To learn more about the different project phases, click here. Active projects may apply against your plan's limit, depending on what plan you're on and whether or not you will be adding a client to the project in the future.
- Financial structure: Select whether the project will be a fixed price (where you will set the price for the client), or open book (where the client's price will be determined by your actual costs, plus markup). Open book arrangements in CoConstruct include cost-plus and time and materials. If the project is fixed price, you can choose whether you want to use the estimate and job costing features of CoConstruct. If you won't be building your estimate or tracking the budget in CoConstruct, you can additionally set the base price (or the contract price.)
- Schedule template: Choose from one of our pre-loaded schedule templates, or one that has already been imported or set up on your account. This is a quick way to build your project's schedule, since the same tasks will generally need to happen on many projects, and in roughly the same order.
Optional settings
- Updates cleared by: Select who will be ultimately responsible on this project for reviewing any updates from subs, clients, or other team members, to make sure nothing slips through the cracks.
- My team access: You may have users on your team who do not have access to all of the projects on your account. In that case, you can specify who will need to be added to this new project.
- Trade Partner access: Some of your trade partners may be added by default, but you have full control to decide which of your partners should have access to this project through their online portal.
- Clients: You can select a client from your existing contacts or enter a new client contact associated with the project so your team has their information readily available. Once you're ready to start communicating with the client through their project, you can come back and send them the invite.
- Project Financing: Copy the provided link to send clients options for financing project costs up to $100,000. Simply share the link into any message, comment, proposal, change order, and more to provide clients financing options through Lightstream.
- Accounting Integration: Link up your project with the corresponding customer in your accounting software and decide what you want to push and pull between the two systems.
- Color in Task Manager: The Task Manager lets you view all of your upcoming work side by side, across all projects. With all projects viewed in one spot, this color coding lets you easily identify this job.
- Starting and total price labels: If you want to adjust how the system refers to things like "Base Price" and "Total Price" throughout the system, you can do so here. If you are running an open book or cost-plus project, you may use the label "Initial Estimate" in place of "Base Price". For fixed price projects, the term "Contract Price" may more aptly reflect the starting price, and the total will be the adjusted price after factoring in any upgrades or changes.
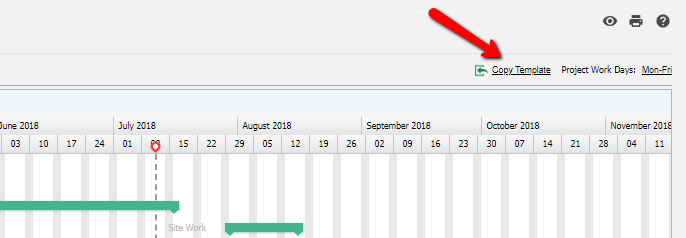
If you did not select a schedule template when creating your project, you will want to go to the Schedule page for that project. Here you will be able to create a Schedule from scratch or select "Copy Template" on either the Gantt or Task views to bring in a template now.
Before you publish your Schedule, you will want to confirm your Milestones (which can be tied to choices on your selections to provide deadlines to your clients), confirm your tasks (verify work days and predecessors are accurate) and assign your trade partners tasks.
Build your estimate and spec sheet
In CoConstruct, your estimate and your spec & selection sheet are fully integrated -- by building your estimate, you'll have a fully-fleshed out proposal and spec sheet for your clients.
Create new selection items OR copy items from your templates to quickly build out your project's cost through cost lines in an Excel formatted view, all the while simultaneously building the spec & selection page for your clients.
Learn more about CoConstruct's powerful Estimating features.
Once you flesh out your first estimate, turn it into a template so that you can hit the ground running on your next job in no time at all!
Invite clients to a project from the Project Setup page
- If you went ahead and added your client's information when setting the project up, you can go back to the Clients section and select "Invite Clients to Project"
- If not, you can select "Add Client" > Select from an existing contact to auto-fill your clients information, or enter from scratch
- If you have multiple clients, you can select who will be the primary user, responsible for clearing updates
- Choose how you wish for your clients to receive their alerts
- Click to "Add client"
- Review the client access settings and make any necessary adjustments so that your clients can see what you want them to see
- Your clients will receive an email within minutes with a temporary password to welcome them to the site