
Editing a Category on the Specs/Selections Template:
Edit Category List
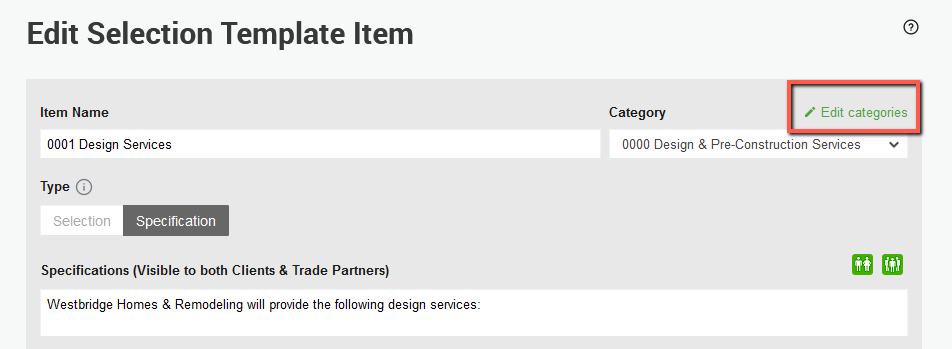
- In the top navigation bar, select Templates > Specs/Selections.
- Select the desired template from the tabs at the top of the page.
- Select Edit on any spec/selection item in the template.
- At the top right, select Edit Categories.
- Edit Existing Categories: Click into the text box of existing categories and make any changes needed. Click SAVE at the bottom.
- Remove Categories: Click the "X" next to any categories you wish to remove. If the category currently has any items assigned in ANY existing templates, you will be asked to reassign items to another category. Click SAVE at the bottom.
- Add Categories: Click Add > Enter the name for the new category. Repeat as needed to add as many categories as you like. Then select SAVE.
- The updated category list will now reflect in the category dropdown for any item on any of your templates as well as new projects you create. Existing projects will not be updated.
*Note: Any edits or delete/reassigns you make from the template level will alter ALL templates where that category is being used. It will not affect any projects where that template has been used.
Edit the Category for a Specific Spec/Selection Item
- In the top navigation bar, select Templates > Specs/Selections.
- Select the desired template from the tabs at the top of the page.
- Find the item you wish to reassign to another category. Select Edit at the top right corner.
- Select the Category drop down and select the new category.
- Click Update item at the bottom of the page.
Editing Categories on a Project
Edit the Category List for a Project from Specs & Selections
- From the Projects page, select the project you wish to edit.
- Navigate to Specs and Selections from the left hand menu bar.
- Select Edit on any spec/selection item on the project.
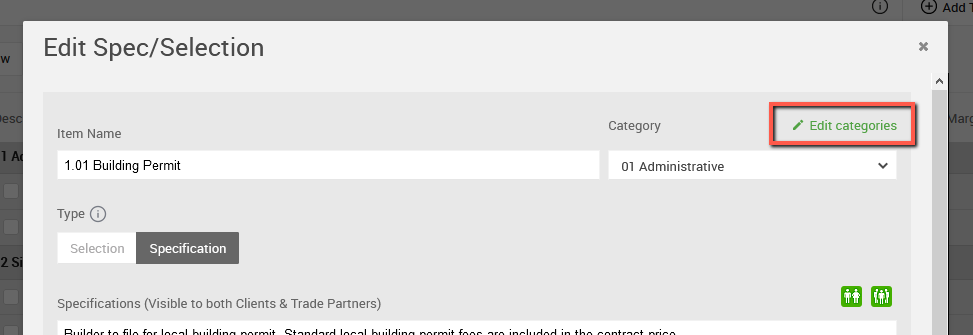
- Select Edit Categories at the top right corner.

- Edit Existing Categories: Click into the text box of existing categories and make any changes needed. Click SAVE at the bottom.
- Remove Categories: Click the "X" next to any categories you wish to remove. If the category currently has any items assigned in ANY existing templates, you will be asked to reassign items to another category. Click SAVE at the bottom.
- Add Categories: Click Add > Enter the name for the new category. Repeat as needed to add as many categories as you like. Then select SAVE.
- The updated category list will now show in the drop down for any items on the project. Changes will only reflect on the specific project you're editing.
Edit the Category List for a Project from the Estimate
- From the Projects page, select the project you wish to edit.
- Navigate to Estimate from the left hand menu bar.
- Click any unlocked item in the Estimate to open the Edit Spec/Selection window.

- Select Edit Categories at the top right corner.
- Edit Existing Categories: Click into the text box of existing categories and make any changes needed. Click SAVE at the bottom.
- Remove Categories: Click the "X" next to any categories you wish to remove. If the category currently has any items assigned in ANY existing templates, you will be asked to reassign items to another category. Click SAVE at the bottom.
- Add Categories: Click Add > Enter the name for the new category. Repeat as needed to add as many categories as you like. Then select SAVE.
- The updated category list will now show in the drop down for any items on the project. Changes will only reflect on the specific project you're editing.